
Guide
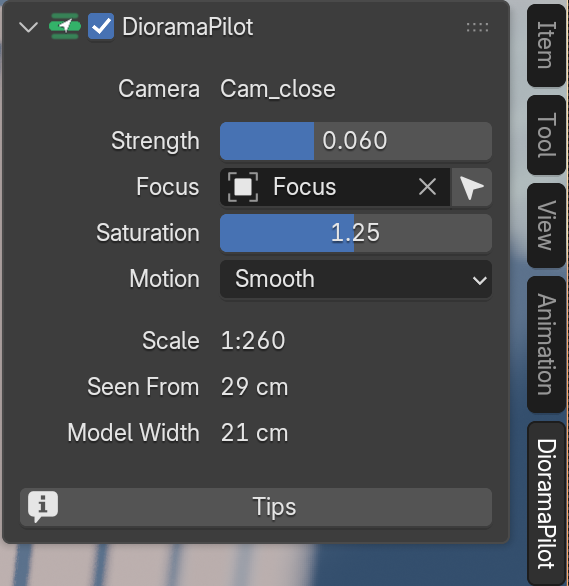
DioramaPilot’s panel is in the 3D Viewport’s sidebar (N), in its own DioramaPilot tab. It works on the selected camera, or else on the scene’s camera, the one F12 renders, and its Camera row names it. Each camera has its own settings. The settings come first, then the values DioramaPilot works out from them. Press F1 over any setting to open its section here.
On and Off
Section titled “On and Off”The checkbox in the panel’s header turns the look on for this camera. DioramaPilot then switches on the camera’s Depth of Field and sets its focus distance and f-stop for you, so leave those two to it while the look is on. The blur follows the camera live: move or animate the camera and the f-stop changes with it.
Without a focus, DioramaPilot focuses on the surface in the middle of the frame.
When you untick it, DioramaPilot puts back the camera’s own depth of field as it was and takes out the saturation step. DioramaPilot keeps its own settings, so the next tick gives the same look.
The panel is greyed out for an orthographic or panoramic camera: the look needs a perspective lens (Lens > Type).
Strength
Section titled “Strength”How much the top and bottom of the frame blur. More strength makes the scene look smaller, as Scale shows. The same strength gives the same look with any lens and in any scene size, in metres or centimetres.
The slider runs from 0.01 to 0.15, and you can type up to 0.5. 0.06 suits most town and street shots; go higher for a wide shot, lower when only a hint of the effect should show.
What stays sharp. A band through it stays in focus while the rest blurs.
- The field takes any object: pick it from the list or with the eyedropper.
- The arrow next to it lets you click a spot in the 3D viewport. DioramaPilot puts an empty called Focus on the surface you click and parents it to that object, so the focus stays on a moving car. Esc cancels. Each camera has one point and moves it on the next click.
The focus point shows while the look is on and hides when you untick it. It never renders.
Saturation
Section titled “Saturation”Painted models have stronger colours than the real world. Above 1, DioramaPilot adds one compositor step that raises the saturation: 1.25 is the default, and the slider runs from 1 to 1.5. At 1 nothing is added.
The step runs after your own compositor nodes and leaves them as they are. It shows in F12 renders and in the viewport when you look through the camera in Material Preview or Rendered.
Motion
Section titled “Motion”How keyframed objects move.
- Smooth: as they are animated.
- On Twos: each pose holds for two frames, like stop motion. Cars and people hop from pose to pose.
- On Threes: each pose holds for three frames, a rougher stop motion.
The camera always moves smoothly. Your keyframes stay as they are: DioramaPilot adds a Stepped modifier of its own to each animated object and removes only its own when you set Smooth or untick the look.
Scale, Seen From and Model Width
Section titled “Scale, Seen From and Model Width”The three values under the settings say what the look makes of your scene.
Scale is how much smaller than real the scene looks. At 1:250 a 25 m house looks 10 cm tall, like a model on a table. More strength gives a larger number, so a smaller model. Scale depends on how far away the focus is.
Seen From is how far from that model a real camera would stand to blur this much, with a lens at f/4. At 29 cm it looks like a photo taken close over a table.
Model Width is how wide the part of your scene in the frame would be as that model on the table. At 21 cm the whole shot would fit on a sheet of paper. It depends on the lens and the strength only: more strength makes it smaller, a longer lens makes it wider.
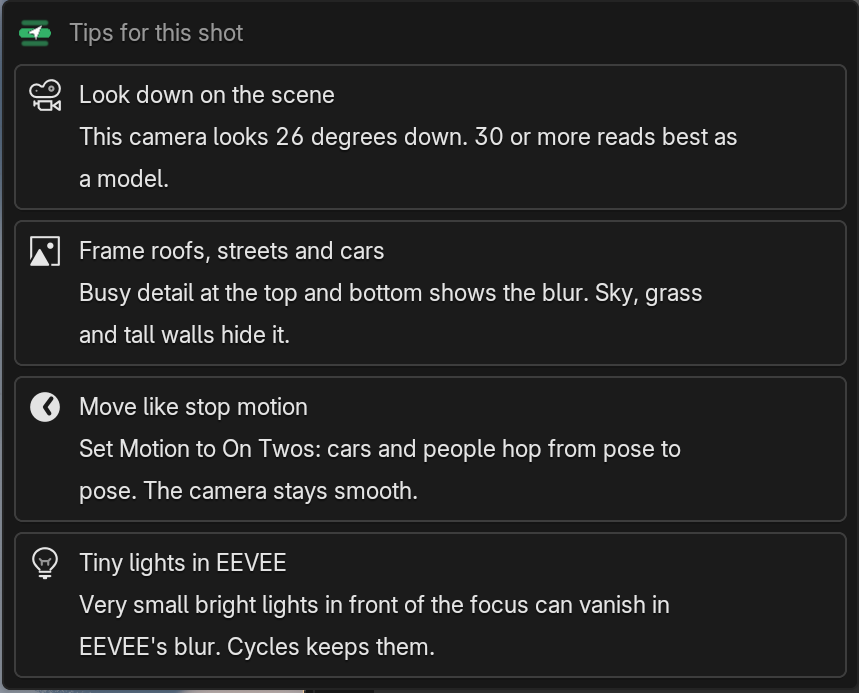
Tips opens a pop-up with advice for this camera and scene. It shows only what applies: how far the camera looks down (30 degrees or more reads best as a model), where to focus until you pick something, what to frame, Motion while it is Smooth, and small lights in EEVEE.
Cycles and EEVEE
Section titled “Cycles and EEVEE”The look renders in both engines and they match closely. EEVEE can drop very small bright lights in front of the focus into the blur; Cycles keeps them. With saturation above 1, an EEVEE render does its compositing on the CPU, because some graphics cards render it black on the GPU.
Several cameras and scenes
Section titled “Several cameras and scenes”Each camera has its own look. When timeline markers switch cameras, the look follows the camera of each frame. Each scene in a file keeps its own compositor step.
Ctrl+Z and Ctrl+Shift+Z undo and redo every change, the tick included.